The Complete RV Winter Prep Checklist: Winterization for Storage or Snowbird Travel
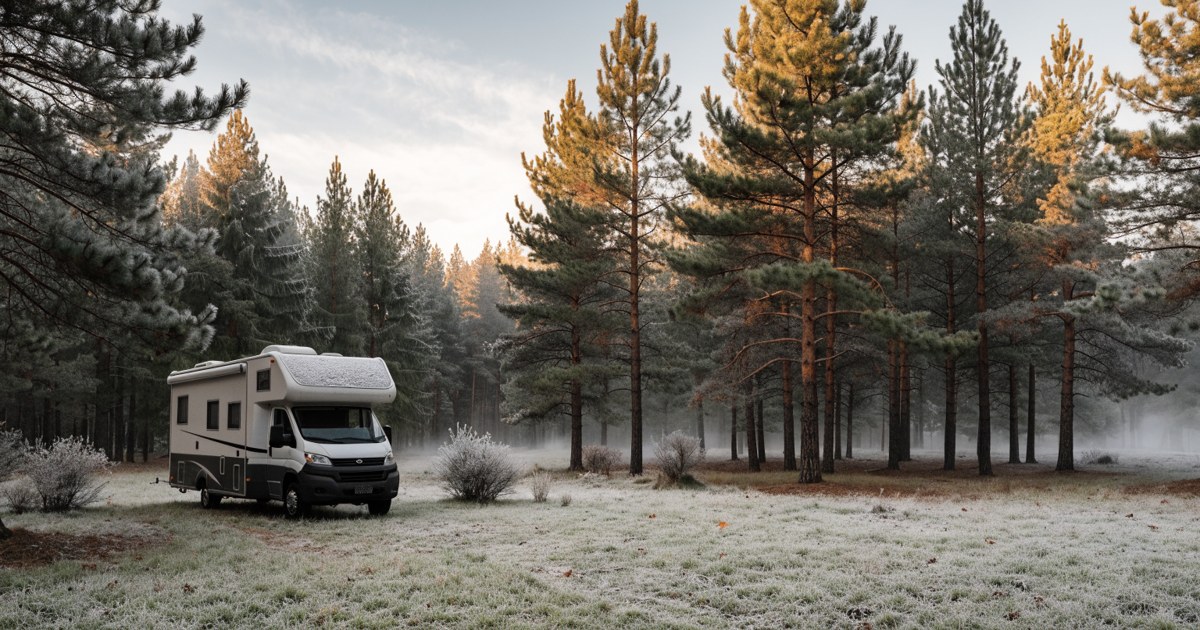
As temperatures drop and the holiday season approaches, RV owners face an important decision: winterize and store, or prepare for snowbird travel south. Either way, proper winter prep protects your investment and keeps you safe on the road.
This guide covers both scenarios — what you need to do if you are parking your RV for the winter, and what you need to check if you are heading to warmer climates.
Should You Winterize Your RV?
The answer depends on where your RV will be and what temperatures it will face.
You need to winterize if:
- Your RV will be stored in an area where temperatures drop to freezing (32°F / 0°C) or below
- The RV will sit unused through winter months
- You will not have access to shore power or heated storage
You can skip full winterization if:
- You are heading south to consistently warm climates
- Your RV will be stored in climate-controlled (heated) storage
- You will be using the RV throughout winter in warm areas
Even if you are escaping to Arizona or Florida for the winter, some of the prep steps in this guide still apply — battery maintenance, tire checks, and system inspections matter whether you are storing or traveling.
Winterizing Your RV Water System (For Storage)
Water system winterization is the most critical step for RVs being stored in freezing temperatures. Water expands when it freezes, and frozen pipes can burst, causing thousands of dollars in damage.
What You Will Need
- 2-3 gallons of RV antifreeze (pink, non-toxic, rated for -50°F)
- Water heater bypass kit (if not already installed)
- Air compressor (optional, for blow-out method)
- Basic hand tools
- Holding tank cleaning wand
Step-by-Step Water System Winterization
1. Drain all tanks
Start by draining your fresh, grey, and black water tanks completely. Use an RV dump station for the grey and black tanks, and use a tank cleaning wand to flush out the black tank thoroughly.
2. Drain the water heater
Turn off the water heater and let it cool completely (at least an hour). Remove the drain plug or open the drain valve and let all water drain out. Remove the anode rod if your water heater has one — this is also a good time to inspect it and replace it if needed.
3. Open all faucets and drains
Open every faucet in your RV — kitchen sink hot and cold, bathroom sink hot and cold, shower hot and cold, outdoor shower if you have one, and flush the toilet. Locate your low-point drain valves (usually under the RV) and open those as well.
4. Bypass the water heater
Set your water heater bypass valve to "bypass" position. This prevents antifreeze from filling your 6-10 gallon water heater tank, which would waste several gallons of antifreeze. If your RV does not have a bypass installed, you will need to install a bypass kit — it is a simple three-valve setup that routes water around the heater.
5. Pump antifreeze through the system
There are two methods for getting antifreeze into your lines: the pump method and the blow-out method. Most RVers use the pump method.
Pump method: Disconnect the inlet line to your water pump and attach a short hose that reaches into your antifreeze jug. Turn on the water pump. Starting with the faucet closest to the pump, open each hot and cold faucet one at a time until you see pink antifreeze flowing out. Do this for every faucet, the toilet, the outdoor shower, and any other water outlets. Remember to run antifreeze through your washing machine connections if you have a washer.
Blow-out method: Some RVers prefer to use an air compressor to blow out water lines instead of using antifreeze. Connect an air compressor (set to 30 PSI maximum — higher pressure can damage lines) to your city water inlet with an adapter. Blow air through each line until no water comes out. Even with the blow-out method, you should still add a cup of antifreeze to each drain trap (more on that below).
6. Protect drain traps and toilet seals
Pour a cup of RV antifreeze down each sink drain, the shower drain, and into the toilet bowl. This protects the P-traps and toilet seals from freezing.
7. Protect exterior fixtures
Run antifreeze through your outdoor shower, outdoor kitchen faucet, and any other external water connections. Do not forget your black tank flush if you have one — run antifreeze through it as well.
Common Water System Winterization Mistakes
- Forgetting the washing machine: If your RV has a washer, you need to run antifreeze through both hot and cold supply lines.
- Not bypassing the water heater: This wastes 6-10 gallons of antifreeze per fill cycle.
- Using automotive antifreeze: Only use RV-specific antifreeze (the pink stuff). Automotive antifreeze is toxic and will damage your RV plumbing.
- Leaving the black tank valve open: Close all tank valves after draining so antifreeze can protect them.
Interior Winterization (Storage)
Your RV interior needs protection too, especially if it will sit for months in cold or fluctuating temperatures.
Remove all perishables and liquids
Take out all food, beverages, medications, toiletries, and anything that can freeze, spoil, or attract pests. This includes:
- All food from cabinets, fridge, and freezer
- Canned goods (many can burst if frozen)
- Bottled water and other beverages
- Toothpaste, shampoo, and lotions
- Medications
- Propane canisters (small ones like camp stove fuel)
Leave cabinet doors and the refrigerator door propped open to allow airflow and prevent mold.
Prevent mold and mildew
Moisture trapped inside a closed RV in winter creates the perfect environment for mold. Here is how to prevent it:
- Remove all fabric: Take home bedding, towels, clothing, rugs, and curtains if possible. If you leave cushions and mattresses in the RV, stand them up on edge or prop them at an angle to allow airflow underneath.
- Clean thoroughly: Vacuum, wipe down surfaces, and clean the bathroom and kitchen. Mold grows on food residue and dirt.
- Use moisture absorbers: Place several DampRid containers or rechargeable dehumidifier packs throughout the RV. Check and replace them if you visit mid-winter.
- Ventilate strategically: Crack one roof vent slightly (with the vent cover closed to keep rain and snow out). This allows some air circulation without letting in precipitation. Some RVers also crack a window an inch on opposite ends of the RV.
Protect against pests
Mice, rats, squirrels, and insects love to nest in stored RVs. They can chew through wiring, insulation, and upholstery. Prevention is much easier than dealing with an infestation in spring.
- Seal all entry points: Walk around your RV and check for gaps around plumbing, vents, slideouts, furnace exhaust, and refrigerator vents. Use steel wool (mice cannot chew through it) to plug gaps, then cover with spray foam or caulk.
- Cover roof vents: Use vent covers or seal vents with tape. Mice can climb and will enter through roof vents.
- Use deterrents: Place dryer sheets, peppermint oil-soaked cotton balls, or ultrasonic pest repellers throughout the RV. Replace dryer sheets every few weeks.
- Do not leave food: Even a few crumbs can attract rodents. Clean thoroughly.
- Check for evidence: If you visit your RV mid-winter, look for droppings, chewed materials, or nesting. Catch problems early.
Climate control considerations
If you have access to shore power at your storage site, you have options:
- Space heaters on low: A small space heater set to 40-45°F prevents hard freezing but is not warm enough to encourage mold. Make sure your heater has automatic shutoff features and is UL-rated for unattended use. Monitor fire risk carefully — this is not risk-free.
- RV heater on low: Same principle as a space heater but using your RV furnace. This uses propane, so you need to ensure your propane system is safe for unattended operation and that you have enough fuel for the season.
If you do not have power or prefer not to heat the RV, full winterization is your only safe option.
Exterior Winterization (Storage)
Clean and protect the exterior
A clean RV stores better. Dirt, bugs, and road grime can damage paint and seals over time.
- Wash and dry thoroughly: Use RV-specific wash soap. Pay attention to the roof — that is where most leaks start.
- Inspect and repair seals: Check all caulking and sealant around windows, doors, vents, and slideouts. Repair any cracked or missing sealant before winter. Water intrusion during winter freeze-thaw cycles causes major damage.
- Wax the exterior: A good coat of wax protects the finish. Do not wax decals.
- Clean and dry the awning: Extend your awning fully, clean both sides, and let it dry completely before retracting. A damp awning will mold.
Tire and wheel care
Tires are expensive, and improper storage can shorten their life.
- Check tire pressure: Inflate tires to the maximum pressure listed on the sidewall. Tires lose pressure over time, and underinflated tires develop flat spots.
- Use tire covers: If storing outdoors, tire covers protect against UV damage, which causes cracking.
- Consider tire cradles or leveling blocks: If your RV will sit for more than a few months, placing the tires on cradles or leveling blocks reduces flat-spotting. Some RVers move their RV a few feet every month.
- Check for damage: Look for cracks, bulges, or uneven wear before storage. Replace damaged tires before next season.
Battery care
RV batteries will discharge over winter, especially in cold temperatures. Dead batteries can freeze and be permanently damaged.
If you have shore power:
- Leave batteries connected to an automatic float charger or battery tender. This keeps them topped off without overcharging.
If you do not have shore power:
- Disconnect the battery (negative terminal first) and remove it from the RV.
- Store the battery in a warm, dry location (basement, garage, shed — anywhere above freezing).
- Charge the battery fully before storage.
- Check the charge every 4-6 weeks and top it off if needed.
- A fully charged battery can handle freezing temperatures. A dead battery will freeze and crack internally.
For RVs with multiple batteries, label them so you know where each one goes when you reinstall them in spring.
Propane system
If you are storing your RV:
- Turn off propane at the tank. Close the valve completely.
- Check for leaks before storage. Use soapy water on connections — bubbles indicate a leak. Fix leaks before closing up.
- Leave tanks attached if possible. Removing propane tanks is not required unless your storage facility requires it.
If you are traveling south for winter, you still need propane. Check for leaks before departure and ensure your tanks are filled.
Cover or no cover?
RV covers are controversial. They protect against UV, weather, and dirt, but poorly fitted covers can trap moisture, chafe against the RV in wind, and cause more damage than they prevent.
Use a cover if:
- You have a high-quality breathable RV cover designed specifically for your RV size and shape
- You are storing outdoors with no shelter
- You can secure the cover properly so it will not flap in the wind
- You will check on the RV periodically to make sure the cover is not chafing or trapping moisture
Skip the cover if:
- You are storing under a roof or in an enclosed building
- You can only afford a cheap tarp-style cover (these do more harm than good)
- Your storage site is in a high-wind area where covers blow off or flap constantly
Preparing Your RV for Winter Travel (Snowbird Season)
If you are heading south instead of storing your RV, you have different priorities. You still need to protect your investment, but your focus shifts from winterization to pre-trip safety and system checks.
Safety inspection before departure
Before you hit the road for a multi-month snowbird trip, do a full safety check:
- Tires: Check pressure, tread depth, and age. Tire blowouts are dangerous and expensive. If your tires are more than 5-6 years old (check the DOT date code on the sidewall), consider replacing them before a long trip.
- Brakes: Test brakes and have them inspected if you notice any pulling, grinding, or reduced stopping power.
- Lights: Check all exterior lights — turn signals, brake lights, running lights, and clearance lights. Replace any burned-out bulbs.
- Hitch and tow connections: Inspect your hitch, ball mount, safety chains, and breakaway switch. Check wiring connections for the trailer.
- Slide-out seals: Inspect all slide-out seals for cracks or gaps. Leaks during travel can cause major interior damage.
- Roof and exterior seals: Check caulking around vents, windows, and doors. Repair any gaps.
- Fire extinguishers and smoke/CO detectors: Test them and replace if needed. Check expiration dates on fire extinguishers.
Systems check before the trip
Make sure all your RV systems work properly before you leave:
- Furnace and heater: Test them now, even if you are heading to warm weather. Mountain passes and desert nights can be cold.
- Water pump and faucets: Run all faucets and check for leaks.
- Water heater: Make sure it heats water on both propane and electric.
- Refrigerator: Test on both propane and electric modes. Make sure it cools properly.
- Air conditioner: Test it even though you may not need it immediately.
- Generator (if equipped): Run the generator under load and check for any issues.
- Propane system: Check for leaks at all connections and make sure your tanks are full.
Pack smart for extended travel
A multi-month snowbird trip is different from a weekend camping trip. You need supplies, tools, and spares:
- Tool kit: Basic hand tools, duct tape, zip ties, electrical tape, hose clamps, and spare fuses.
- Leveling blocks and wheel chocks: Essential at every campground.
- Sewer hose and fittings: Bring extra — sewer hose failures are common and unpleasant.
- Water hose and pressure regulator: Many campgrounds have high water pressure that can burst RV plumbing.
- Surge protector: Protects your RV electrical system from campground power surges.
- First aid kit and medications: Stock enough for your entire trip.
- RV-specific spare parts: Spare fuses, light bulbs, water pump fittings, toilet seals, and anything specific to your RV model.
Plan your route with RV safety in mind
Winter snowbird travel often involves mountain passes, desert highways, and unfamiliar roads. You need a route that accounts for your RV size, weight, and propane restrictions.
Here is where VistaBound does the heavy lifting. Instead of manually checking every road for clearance, weight limits, and tunnel restrictions, VistaBound plans your entire route with RV-safe navigation built in. It knows your rig dimensions, avoids low bridges and tight turns, and routes around propane-restricted tunnels.
You can also use VistaBound to find campgrounds along your route that fit your RV and have availability. The live campsite availability feature means you are not planning around campgrounds that are already fully booked. And if your first-choice campground is sold out, Campsite Radar will alert you the moment a cancellation opens up.
Whether you are chasing warm weather for three months or just planning a two-week winter escape, VistaBound handles the route, the campgrounds, and the day-by-day details so you can focus on the road.
Try VistaBound free — no credit card required. Plan your snowbird route, find RV-safe roads and bookable campgrounds, and navigate with CarPlay or Android Auto.
Common Winter RV Problems (And How to Prevent Them)
Frozen pipes
Even if you winterize, a sudden cold snap during travel can freeze your water lines. If you are camping in temperatures near or below freezing:
- Run a trickle of water overnight through faucets to keep water moving in the lines.
- Open cabinet doors under sinks to let warm air reach the plumbing.
- Use RV skirting to create a thermal barrier around the underside of your RV.
- Run the furnace to maintain interior temperature above freezing.
Condensation and mold
Cooking, showering, and breathing all create moisture. In a closed RV in cold weather, that moisture condenses on cold surfaces and leads to mold.
- Ventilate while cooking: Run your range hood vent or crack a window.
- Use a dehumidifier: Small rechargeable dehumidifiers help control moisture.
- Wipe down condensation: Every morning, wipe condensation off windows, walls, and ceilings.
- Keep air moving: Run ceiling fans to circulate air.
Propane usage and safety
Winter RVing uses a lot of propane for heating. Make sure you have enough and that your system is safe:
- Monitor tank levels: Keep an extra full tank or know where to refill along your route.
- Check for leaks regularly: Soapy water on fittings will bubble if there is a leak.
- Never use unapproved heaters indoors: Only use RV-installed furnaces or RV-rated portable heaters with automatic shutoff features.
- Install CO detectors: Carbon monoxide is odorless and deadly. Test your detectors regularly.
Battery drain in cold weather
RV batteries lose capacity in cold temperatures. A battery that lasts five days in summer might only last two days in winter.
- Charge batteries more frequently.
- Use shore power or a generator to recharge.
- Consider upgrading to lithium batteries if you do a lot of winter camping — they handle cold better.
- Disconnect parasitic loads: Even when "off," some electronics draw power. Disconnect what you are not using.
Spring De-Winterization Checklist
When winter ends and it is time to wake your RV from storage, you will need to de-winterize and inspect systems before your first trip.
Flush the antifreeze
- Keep the water heater in bypass mode for now so antifreeze does not get pulled into the tank.
- Fill the fresh water tank halfway.
- Turn on the water pump.
- Run all faucets one at a time (hot and cold) until the water runs clear with no pink color.
- Flush the toilet until clear.
- Reinstall the anode rod or drain plug in the water heater if you removed it in the fall.
- Take the water heater out of bypass and let it fill completely. Bleed air out of the hot water line by running a hot water faucet until the flow is steady. Only turn the water heater on once the tank is full.
Inspect and test all systems
- Check seals and caulking again.
- Test all appliances — fridge, stove, water heater, furnace, A/C.
- Reinstall and charge batteries.
- Check tire pressure and inspect for damage.
- Sanitize the fresh water system with a bleach solution (1/4 cup bleach per 15 gallons of water). Fill the tank, run bleach water through all faucets, let it sit for a few hours, then drain and flush thoroughly until there is no chlorine smell.
Winter Prep Is About Protecting Your Investment
Whether you are winterizing for storage or prepping for snowbird travel, proper winter maintenance protects your RV from expensive damage and ensures it is ready when you need it.
Water damage from frozen pipes, mold from trapped moisture, and pest infestations can all be prevented with the right prep. And if you are traveling south, a thorough pre-trip inspection and smart route planning make the difference between a smooth snowbird season and a breakdown on the side of the road.
Planning a winter RV trip? Try VistaBound free to plan your route with RV-safe navigation, find bookable campgrounds, and navigate with CarPlay or Android Auto. Founder pricing of $41/year is still available for the first 500 annual members — lock it in for life.